Home Blog

Do Metal Roofs Need Gutters? All You Need To Know

0

The home equipment field develops rapidly with new technologies day by day. Thus, nowadays, there are some different types of roofing systems that comes with various characteristics. However, we cannot ignore some essential parts of the roofing that is needed for the protection and durability of our home. And gutters are such a thing that we pay attention when installing a roofing system. But do metal roofs need gutters? This newest obsession has gained popularity as a roofing system that does not require gutters. So today, let’s discuss the veracity of this, so you will be able to decide whether you will install gutters for your metal roof or not.

Do Metal Roofs Need Gutters? 

Gutters act as protective armor around your house because it protects the house and its siding from rainy water. Gutters are commonly used for traditional asphalt shingle roofing, but if you wish to equip your home with a metal roof, you will have this problem regarding the necessity of gutters. The short answer is no; metal roofs do not require gutters. It can survive without a gutter system, not like traditional asphalt shingles. The reason why, metal roofs are water resistant.

However, there may be some problems because the roof itself cannot protect the siding of your home, walkways, and flower beds from the rain. The water might leak through the siding panels due to the absence of gutters.

If you do not prevent it, finally, you will have to do a costly repair as well. Besides, if the roof is not equipped with a proper drainage system, the flower beds around the roof might be damaged. And gradually, it affects the foundation of your home because rainwater will be able to trickle into the foundation. Thus, it is questionable to install a roof without gutters because of the above risks you have to face.

What is the Best Gutter System for a Metal Roof? 

Since you know the importance of gutters, let’s discuss what the best type of gutter system for a metal roof is. There are several kinds of gutters for roof styles and sizes. When it comes to metal roofing, it is recommended to use any gutter system for metal roofs that you can attach to the fascia board by experts in the field. But there are do nots as well. You should not install gutters that need straps to anchor because the heaviness can harm the eaves and sheathing.

The best types of gutters for metal roofing are half-round or K-style gutters since they are attached to the fascia boards.

  1. Half-round Gutters – this type of drainage system is highly effective, although it is a traditional style. As the name suggests, it looks like a half-cylindrical tube. Additionally, you will need a special bracket to set the gutters in place.
  2. K-style Gutters – these come in aluminum or galvanized steel, so they are somewhat heavy. The outer look of K-style gutters is better than half-round ones since they indicate the letter ‘K’ when viewing from the sides. Moreover, they can handle a water capacity more than half round gutters.

How do Gutters Attach to a Metal Roof? 

First and foremost, you are reminded to get the service of a professional if you are unable to fulfill the task by yourself, especially the weight of the components is a matter to consider here, so a professional would calculate the measurements precisely. However, we will provide you with a guide on how to attach gutters on metal roofs.

First, you should measure the length of the metal roof. But take care of yourself because metal roofs are slippery. The length of the gutter should be equal to the full length of the roof. After that, choose the right type of gutters for your metal roofs. We recommend half-round ones or K-style ones.

Then you have to cut the gutters using a sharp power tool. If your roof has already been drilled, it will be easy to install gutters. If not, then you have to drill the roof to attach the gutters. Finally, the gutters should be attached to the brackets that you made on the roof. Use screws to ensure that everything is properly fit.

What are the Disadvantages of Using Gutters on Metal Roofs?

The metal roofs themselves are quite expensive because of their novelty and the ability to water resistance. And if you additionally install a gutter system to metal roofs, you will have to spend some more money for gutters as well as hire. So, the cost is the most prominent drawback here. And when you install the gutter system, it should be done carefully and precisely because an improper installation causes various issues, such as ripping off the gutter in stormy weather.

Thus, you have to maintain the gutter system properly with extra care. And filthy gutters cause a blockage, so the drainage will not be fulfilled by them. Then the gutters are too heavy, and they can cause rip off the roof. In brief, there may be some disadvantages of metal roofs with gutters, but as long as you can maintain them properly, it will not be problematic.

When Do Metal Roofs Need Gutters?

We know that metal roofs can survive without gutters. However, they will need gutters due to weather changes. So, if your home is located in an area that often experiences rain, storms, severe winds, or snow, it is better to install a gutter system; otherwise, the lifespan of the roof will be lower. And if the roof is very old, you can install a gutter system to strengthen it.

Do you need a drip edge with a metal roof? 

You can see metal sheets at the edge of the roofs, and they are called drip edges. And they are highly beneficial on metal roofs. Drip edges are designed to keep water away from the structure of the home, so it really affects the durability of the roof. In addition, it protects the roof from severe winds and storms.

What’s more, they can decrease the noise of rain, which is an issue that comes with metal roofs because drip edges act as bumper on the roof panels. Last but not least, drip edges enhance the look of the roof. So, never miss drip edges when you install metal roofs to achieve these benefits. It is worth your money!

You May Also Like

How to Reheat Beignets? Tips on Which Method Is Best!!

0

A chocolate-filled pillowy beignet is a treat that no one refuses. This deep-fried pastry type has an addictive softness that makes them stand out from other snacks. The dough is similar to a doughnut but contains more grams of yeast, making the inside include large hollows. The fillings have a variety of options, like chocolate, raspberry and cream filled. How to reheat beignets? If you are a huge fan of beignets, this must also be a relevant question for you. Yes, throwing such a delish plate in the dustbin is a pain. Let’s check the smartest way to make your favourite beignets live again.

How to Store Leftover Beignets?

When you start the party with plenty of beignets and end with leftovers, there is nothing to worry about. You can save them for future use. We are going to help you with the process here. There are three methods you can apply to conserve ready-made beignets. You are free to select a method that satisfies your need. 

You can put the leftover beignets in a sealed container. But ensure you have a proper lid because if the air enters, your beloved pastries will become soggy within a few hours. If there is a gap between the seal and the container, there is a potential risk of contamination with microorganisms. Therefore, select a spacious air-tight container. You can keep this container on your countertop, pantry or dining table. 

Next comes the refrigerating method. Here, you need to arrange the beignets in an air-tight container and close the lid properly.

The third option is freezing. You can extend the shelf life of your beignets excessively with this method. You need to use an air-tight container here too. One more step is added in freezing. Before placing the beignets in the container, you have to wrap each with a paper towel, parchment or aluminium foil. 

How Long Do Beignets Stay Fresh? 

If you forget to use a storing method and allow your beignets to stay on your kitchen top for a few hours, you will remain in pain because a few hours are enough for this fried snack to go stale. You will find beignets with hard texture when kept without a proper covering.

You have two more days left in your hands to finish the stored if you choose to store them in an air-tight container on your pantry or the countertop. Sometimes it would still be good on the third day too. But you cannot extend the dates any further with this method.

If you keep the leftovers in the refrigerator, as we explained above, your beignets will be saved for a maximum of five days. 

By freezing, you could extend the shelf life of your beignets for over 1 month; Sometimes, two months could even be possible.

Are Beignets Eaten Hot or Cold?

Beignets are eaten hot. Just after the frying is the best time to taste a beignet; you know that the tradition is to spread sugar powder over the tops of beignets. When the clock turns rounds, this sugary topping tends to dissolve, making the surface sticky and wet.

Furthermore, if you rest it on a table for a few hours, the entire item will be soggy as per the moisture in the surrounding. You will end up biting a hard-textured piece of a beignet. 

Therefore, try to consume beignets just after they come out of the frying oil. 

Are Beignets Supposed to Be Chewy?

Beignets are chewy. When those are freshly made, you can find a crispy texture in beignets. 

If you are offered a beignet with a hot coffee, always accept it. You will find a colourful emotion while tasting the combo. But wait! Do you know how to eat those?

You will have to know a few tricks when eating a beignet. First, lean somewhat forward when holding the beignet to avoid the sugar falling into your dress. You must practise taking a bite from your beignet in the exhale. Because trying to eat at a time of inhaling will make the powdered sugar enter your nasal cavity. You will end up excessively coughing. 

Can you Reheat Beignets?

Beignets are a worthy pastry to be preserved when you have plenty. You can reheat the amount you need for one serve. But if you are unfamiliar with the process, you will get confused with the steps and appropriate temperatures. The below guide will help you with the reheating.

You can use a microwave or an air fryer for reheating. An oven is also an available option for reheating, but it is only recommended to use an oven when the beignets are made on the previous day. The ideal oven temperature is 180°C, and you will have to preheat the oven for 10 minutes before placing the beignets in. You need to set the timer for 5 minutes. 

How to Reheat Beignets in Air Fryer? 

An air fryer is an effective method you can use to reheat many days-old beignets kept in a refrigerator or freezer effectively. It will not give the exact results of a freshly fried beignet, but you will find one so close to its original texture and flavour. 

If you are going to reheat frozen beignets, take out the required amount only. Keep it on a plate at room temperature to thaw. When those become soft after a few minutes, your beignets will be ready to go inside the air fryer. 

The recommended heat is 350 °F. Place oil paper or parchment paper on the bowl of the air fryer. Then you can place the beignets inside. Here, be cautious about placing them in a manner that does not touch each other. Do not place beignets one over another. Fry for about 3 or 4 minutes. 

How to Reheat Beignets in Microwave?

This is the most suitable method to get a similar result as the freshly fried. You can place the beignets on a plate or a container suitable for microwaving and let it heat for about 10 seconds. Sometimes you will need to wait 15 seconds. Use the high heat. If the beignets are dried, place a wet paper towel over the units before keeping them inside. The moisture will again make the beignets feel alive. 

You May Also Like

Is it Worth Buying a Rice Cooker? Here’s What You Need To Know!!

0

Have you become weary of continuously checking the rice to discover that it is either undercooked or overcooked? If that is so, you might be thinking, “Is it worth buying a rice cooker?” These helpful kitchen gadgets have grown in popularity recently, but are they worthwhile to purchase?

In order to help you determine if buying a rice cooker is worthwhile for your family, we will look more closely at the advantages and disadvantages of doing so in this post. We have all the information you need, from how much time and effort it may save people inside the kitchen to any potential downsides.

What are the Uses of a Rice Cooker?

A gadget in the kitchen called a rice maker is made exclusively for cooking rice. The system is made out of a pot, including a heating element there at the bottom as well as a thermostat which can determine whenever the rice is finished cooking. Numerous rice cookers include a schedule, allowing you to set it ahead of time and have precisely cooked rice available whenever you require it.

Making rice without guessing is among the key advantages of utilizing a cooker. Each time you use a rice cooker, the rice comes out great. Just put the correct quantity of rice plus water inside the rice cooker, set it on, as well as wait until it begins to cook.

A steaming basket and “stay warm” settings are just two of the extra features that many cookers provide in regard to cooking rice. Thus, as the rice cooks underneath, you may steam veggies, dumplings, or even other dishes inside your rice cooker. Maintaining the grains at the ideal serving degree till you are ready to consume them is another benefit of using the “keep warm” option.

Utilizing a rice cooker may also help you save money and effort in cooking. Setting the rice cooker allows you to proceed with your other duties without having to stand more than a stovetop pot of rice, continuously stirring as well as monitoring it. This is particularly helpful for time-pressed home cooks who must multitask inside the kitchen.

Rice Cooker or Pressure Cooker?

The rice cooker is often simpler to operate and is made particularly for cooking rice. Just put the correct quantity of rice plus water inside the rice cookers, set that on, then wait until it begins to cook. You may use a lot of rice cookers for those other activities in the kitchen because they often come with extra features like that of a steamer basket or even a “stay warm” mode. The one and only meal that can be cooked in a pressure cooker is simply rice; other foods cannot be cooked in one.

In contrast, a pressure cooker provides a more versatile kitchen tool that is able to prepare a range of dishes, including grains. A pressure cooker cooks food more quickly than a regular pot on the stovetop by using a high-pressure steam system. This offers it a fantastic choice for time-constrained home cooks who have to serve supper swiftly. However, because of the possibility of steam burns as well as the requirement to adhere closely to the directions, using pressure cookers might be scary for some individuals.

So, is it worth buying a rice cooker?

Is it Worth Buying a Rice Cooker?

A rice cooker would be a piece of kitchen equipment made exclusively for cooking rice. Most rice cookers allow you to pre-set them so that when users need the rice, it will be precisely cooked. But is it worth buying a rice cooker?

Let’s examine the advantages and disadvantages of having one in more detail to aid in your decision-making.

Benefits

Rice is cooked without guessing, thanks to this

Without the requirement of continual observation, a rice cooker guarantees that fresh rice gets adequately prepared every time.

It can reduce cooking time and resources

You may turn over the rice cooker as well as carry out your additional duties without being required to stand more than a pot just on a burner.

More Capabilities

Most rice cookers include extra features like a steamer basket or even a “stay warm” mode that let you use them for other household activities.

Drawbacks

Utilizable just for rice preparation

A rice cooker is not the greatest choice if you’re seeking multipurpose kitchen equipment that can be utilized to prepare a range of items.

Cost

The price of rice cookers might vary, particularly if you choose a high-end version.

A little capacity

In order to cook larger amounts of rice, one might have to utilize numerous rice cookers or turn to stovetop cooking because the majority of rice makers only intended to cook a certain quantity of rice.

In general, your individual cooking demands and financial situation will determine if it is worthwhile to purchase a rice cooker. Investing in a rice cooker could be valuable if you often consume rice and like the comfort and simplicity that it provides. In contrast, it could be more economical to continue making rice here on the stove when you only cook rice rarely, or you have a limited budget.

Alternatives to a Rice Cooker

There are many different appliances you can buy if you’re thinking about getting a rice cooker and are trying to decide whether it’s the appropriate one for you. Below are a few ideas for you to think about.

Stovetop Cooking

One of the most common ways to prepare rice is in a saucepan over the stovetop. Although this approach needs more oversight and care, it is a straightforward and affordable choice.

Multipurpose Pressure Cooker

A pressure cooker could be a fantastic choice if you’re searching for a kitchen tool that can make rice, as well as a range of other items. An excellent alternative for harried home chefs, pressure cookers employ high-powered steam to make meals more quickly than a conventional stovetop pot.

Instant Pot

Rice may be cooked in an electronic pressure cooker called an Instant Pot. It is a multifunctional kitchen gadget with several cooking settings, among them one for rice.

Microwave Rice Cooker

The microwave rice cooker could be an excellent choice if users have limited storage space or if you’re looking for a quick and simple way to make rice.

Take into account things like your preferred cuisines, the time and effort you would like to devote to cooking, plus your financial situation.

You May Also Like

How to Clean Up Shattered Shower Door? – Easy Steps!!

0

When cleaning a broken shower door, you should be more careful not to hurt yourself. Anyway, it is not rocket science to clean broken glass, but you must ensure you do it suitably and cautiously to avoid unwanted injuries. So, let’s see how to clean up the shattered shower door.

Cleaning the shower door is not a difficult task but cleaning a broken shower door is a tricky procedure since it has already made a big mess in your bathroom. And also, it might be a dangerous place, especially for your kids because of the broken pieces of glass. So, it would be best to clean it up before anyone gets injured.

How to Clean Up Shattered Shower Door?

To clean up the broken shower door, you will need some protective equipment for your safety, and you will have to follow a few vital steps. Keep reading to know more about cleaning the shattered shower door.

Initially, let’s see the types of safety equipment you need to wear to protect yourself.

You will need thick gloves, long pants, boots, and goggles. Put on all these safety equipment to prevent any damage, as there might be tiny glass pieces that will cut your skin. They might even be invisible. So, it would be best if you took safety precautions.

Then you have to get rid of any broken glasses on the floor. Using a broom, you can put them to a side or throw out the fractured glasses. Then, if any glasses are left on the door, carefully remove those broken glasses before cleaning the bathroom floor. To remove the broken glasses still on the door, you will have to follow a few steps to do it correctly.

First, you must cover the drains using tape to prevent the glass pieces from blocking the pipes. Then place a plastic tarp to catch the broken glass pieces so you can easily remove the fallen portions. Use a small hammer and tap the leftover glass pieces. Then the glass pieces will fall out slowly. After you tap and remove all the glass pieces on the shower door, take out all the glasses carefully. Make sure you dispose of all these broken pieces very carefully.

Then sweep the bathroom floor. Now you got rid of all the large pieces of glass and have to deep clean to remove all the tiny crystals still left on the floor. To do that, take a clean thick damp cloth and wipe out all the surfaces in the bathroom, as the tiny pieces might be everywhere. Make sure you still have your gloves on. You may have to repeat this several times to clean the surfaces thoroughly. And you can get the best results if you have a microfiber cloth in hand because it will pick up all the tiny pieces.

Now that all the visible pieces of glass are gone. Now you can vacuum the bathroom floor to remove any left particles. It is essential to vacuum, especially if you have kids.

What Causes a Glass Door to Shatter?

There are a few reasons why your glass door shatters. Keep reading to know more because you can avoid these types of accidents beforehand if you already know the causes.

The glass will shatter if the door isn’t installed correctly. This is one of the main reasons your glass door will break. So, when you open such weak door, it may fall out and can injure you. Then immediately you will have to replace it with a new one. So, make sure you take the professional’s help when installing the glass door if you do not have enough knowledge to do that.

And sometimes, imperfections of the glass may also cause a glass door to shatter. The other reason might be that the glass door is thin and cannot bear the pressure of the water. However, this is a rare situation.

Thus, if your shower door is tempered, you will be worried less as it will reduce the damages you will face.

How to Clean a Cracked Shower Door without Damaging?

Before cleaning the cracked shower door, you must ensure again that you have safety equipment such as thick gloves, boots, long pants, and goggles. Then take a plastic trap and attach it to the bottom of the shower door to prevent glass pieces from falling onto the floor. Carefully tap the cracked glass door using a small hammer to remove all the broken glass.

Then remove all the glass pieces from the bathroom and dispose of them carefully if you have kids around. Sweep the floor to ensure there are no large pieces of glass on the bathroom floor.

Then wipe all the bathroom surfaces to make sure you remove all the tiny glass particles. It would be best if you always kept in mind to take the best safety precautions when cleaning any broken glass. After you are sure that you removed all the tiny particles on the floor, do sweep the floor again. 

Lastly, you can vacuum the bathroom floor, bathtub, counters, and all the other possible surfaces where glass pieces may still be present.

Is It Okay to Vacuum Broken Glass?

Vacuuming broken glass pieces depends. You cannot vacuum the larger pieces; you can only pick up them one by one or remove the glass pieces using the broom.

It is recommended to vacuum after removing all the larger pieces and wiping the floors with a damp cloth. After all, you can clean the floor bathtub counters for any invisible leftover glass pieces.

If you have kids, it is imperative to vacuum after cleaning the broken pieces of glass. You should ensure you have all the tiny glass pieces out of the bathroom to prevent any injuries. And also, throughout this whole process, remember to wear gloves and boots to avoid any damage.

We hope you got all the necessary answers on how to clean a broken shower door!

You May Also Like

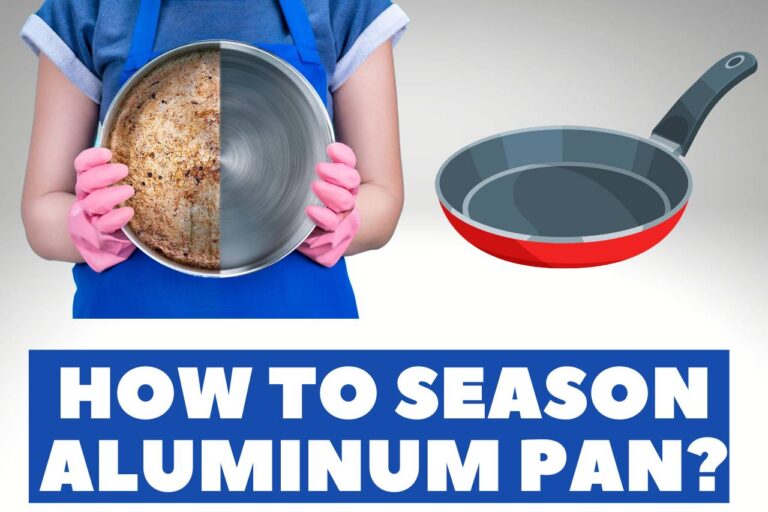
How to Season Aluminum Pan? – The Best Guidance

0

Aluminum cookware is a popular kitchen item worldwide due to its versatile manner. However, it might be a tricky task to season an aluminum pan since improper seasoning causes it to scratch the surface and lose its shine. Therefore, it is worth knowing how to season aluminum pans properly to avoid any damage.

There are two simple methods to season your aluminum pan with your regular kitchen stuff. Today, we will guide you on how to do those two procedures methodologically, so stick with the article.

What is ‘Pan Seasoning’?

Pan seasoning has become a must to save its good quality. The reason why aluminum is a lightweight metal and all metals decay with its time. The process of deterioration may be quickened due to the heat and acids. And we know that aluminum pans often deal with heat and acidic food when we use them for cooking, so they deteriorate quickly. Therefore, the pan seasoning has been a technique for decades to oppose deterioration.

We use oil to season a pan. Then, the oil heats up and bonds strongly with the pan’s surface. And the oil make a coating between the pan and food. There are two advantages of oiling the pan for seasoning. It not only acts as a non-stick coating on the pan but also makes it effortless to clean the pan after cooking. However, with time, the seasoning wears out. Therefore, you may have to do the seasoning again.

Anyways, seasoning is beneficial to prolong its life and protect the shine of aluminum pots and pans, although you use the pan frequently. Thus, you should always season your pans if you wish to use them for a long time.

Now let’s discuss when to season your aluminum pan. It is better to season a pan when it is a brand new one for the best protection. And if you have unseasoned pans yet, season them before you prepare your next meal in the pan because unseasoned pans might be a victim of corrosion, rust, and oxidation because of continuous exposure to heat and acidic food.

How to Season Aluminum Pan?

Seasoning your aluminum pan is not something difficult. And also, you only need a few inexpensive stuff for seasoning. We will explain to you all the essential details of this process so you will be able to keep your pans shiny.

There are two methods to season aluminum pans. You can season the pan using your gas or electric stove. Similarly, you can do it with your oven. Let’s discuss the stove method first.

  1. Seasoning the Pan Using a Stove

  • First, it is highly recommended to clean your pan thoroughly, no matter if you cleaned it last time. Make sure to use some warm water and a gentle soap to clean it. But it is not needed to soak the pan; rinse the pan with a sponge or brush and wipe it using a soft cloth to dry it. It is necessary to have a clean pan without any residue of dirt and dust to avoid scratches and discoloration.
  • Secondly, you can season your pan with oil. In order to do that, first, you must place your pan on the stove on low heat or flame. Remember to keep the pan on low heat; otherwise, the pan will burn due to excessive heat. You can use whatever stove you have, gas or electric. Then you can pour your vegetable oil into the pan. Keep in mind to put a generous coating and cover the base and sides of the pan.
  • Then, keep the pan on the stove until all the oil is burnt off. So, keep watching near the stove. Usually, it may take 20 minutes to evaporate the oil. After this process is completed, you can take the pan off the stove. Ensure to wear an oven glove because the handle might also be too hot to touch after 20 minutes.
  • After the pan cools down completely, you can give the pan a second wash. Use warm water again with a gentle soap. It will be unsafe to use a dishwasher since it may cause to scratch the pan. So, you should do the second wash by hand.
  • Finally, you can dry your seasoned pan using a soft cloth. And make sure to keep the pan in a safe place to get rid of any damage or dirt.
  1. Seasoning the Pan Using an Oven

  • If you wish to season your pan in the oven, you have to preheat the oven to 400 degrees Fahrenheit first. This step is vital because if you do not preheat your oven, the oil you apply to the pan might run off before the seasoning. So, do not skip this step.
  • While preheating your oven, you have time to wash your aluminum pan thoroughly. The properly-cleaned pan will let the oil do its duty better. So, use warm water and soap, as we mentioned in the above procedure, to clean the pan well.
  • Thirdly, you can pour the oil into the pan. Again, do not miss the sides of the pan. Make sure to cover the base and sides of the pan with a generous amount of oil for the seasoning. When choosing an oil for this procedure, try not to go beyond vegetable and flaxseed oil because it is better to use an oil with a neutral flavor. And another thing is the oil you use should have the ability to bond well.
  • Next, let the pan season in the oven for 15 to 20 minutes. Then the oil and aluminum pan will create a great bond. You should place the pan in the middle rack of the oven.
  • After the seasoning, carefully take the pan out using an oven glove and let it cool down. Next, you have to rinse the pan with some warm water. You cannot use a dishwasher to wash your seasoned pan. Then dry your seasoned pan with a clean, soft towel.

You May Also Like

How Long To Boil Chicken Liver? – All You Need To Know

0

Chicken livers make a delicious meal time for anyone, whether you or your dogs and cats. Be on the lookout at each step during cooking to ensure we do not have digestive problems afterward. Since boiling is the most significant step of the process, you may wonder how long to boil chicken liver. 

And the internet is crammed with different theologies. 

Fret not; we will break it down for you in a comprehensive manner. 

Regardless of whom you are looking to cook some delicious chicken liver (maybe for yourself, your family, or your loving pup or cat), you will learn everything you need to know about cooking the best recipe. 

Stick around with us and learn all the secrets. 

We will also be extra kind and share additional ideas and tactics to make the best chicken liver. 

How Long to Boil Chicken Liver? 

It depends on what appliance you use to boil the chicken liver. 

If you are going with a conventional pan or pot, boil the liver pieces for up to 15 minutes. (We’ll teach you how as we move further into the article) 

If you are using a steamer, you will need 30 minutes to boil them. 

If you’ve got a pressure cooker or a multi-cooker to do the chore, it will take about 10 to 15 minutes. 

It would be best if you boiled the liver entirely before consuming.

Consuming raw or half-boiled can mess with your gut and give you digestive issues you do not want to experience, even in dreams.

How to Boil Chicken Liver? 

Boiling chicken liver is a no-brainer if you know what to do. 

Let us walk you through the steps. 

  • Clean the Pieces 

Take the chicken liver pieces from the package and pass them to a bowl. Wash them in the running tap water. 

Fill up the bowl and rinse the pieces. Let them sit in there for about 10 to 15 minutes. 

Then, drain the water from the bowl and make sure the pieces are clean and moisture free. 

You can use a paper towel or a clean cloth to pat the pieces dry. 

Do not put the liver pieces straight into the water if you have frozen chicken liver. 

In such cases, let the liver pack sit in the refrigerator for some time and defrost. (We aim to get the most total original texture and great delicacy)

But yes, you can skip the defrosting step if you are tight on time and must cook as fast as possible.

  • Transfer to an Appliance

Pass the chicken livers into an appliance of your choice. A steamer, pressure cooker, multi cooker, or a conventional pot or pan. 

You can add some salt or butter to elevate the taste. 

If you are cooking the liver for your pup or cat, do not add any other additional ingredients as they may upset their stomach. 

The salt and taste content of the liver alone will be enough for them to enjoy it well. 

  • Pour in Water 

Now it is time to boil the liver. 

We’ll talk about how you can do it using a regular pot since there are no such steps when using other appliances. 

So, pour some clean water into the pot. Make sure there is enough water for the liver to cook evenly. 

The water level should be one inch above the level of the liver. Bear this in mind. 

  • Heat 

We do not want overcooked or undercooked liver. So pay attention to this crucial step. 

Bring the water to a boil by heating the pot. Once the water starts to boil, turn down the heat immediately to the low flame. 

Now let the liver pieces simmer for up to 15 minutes. Do not close the pot with a lid during this process. 

Wait until all the original pink pigmentation of the liver disappear. 

  • Drain 

Time to drain the excess water. 

Use a colander and safely drain out the water. 

Pro tip: save the water as a little treat for your cats and dogs (they love it) 

You can save the water and let it cool down. Serve it to your pets (an excellent way to keep them hydrated since some rebellious ones do not drink much water as they should) 

You can freeze the water for later as well. 

  • Spice Up 

Since the liver is ready to be consumed, let us spice it up for a delicious treat. 

Put some oil/ ghee/ butter into a pan/ pot and let it heat up for a few seconds. 

Add chopped garlic and green chili. Stir until the raw smell disappears. 

Then, add chopped onions and mix the content for a minute or two. Add the tomato pieces now and stir until they are soft. 

You can add seasonings of your choice along with these common ingredients if you prefer. 

Finally, add the boiled liver pieces to the pot/ Pan and mix up the content. Cook for a few more minutes and serve hot. 

However, it is w whole different case if you cook the liver for your pup or cat. 

Do not any additional ingredients to the boiled liver if that’s the case. 

Cut the boiled liver into pieces and serve it to your dogs and cats. 

Be mindful of the size of the pieces. 

If they are small, chop them into tiny pieces so it is easier for your pets to eat and digest them. 

If they are medium-sized, make sure the pieces are neither large nor small. 

You can cut it into large pieces if your buddy is giant. 

Tips for Your Dogs and Cats 

  • Too much of anything is good for nothing. So do not feed your dog chicken liver more than twice a week. It may end in a vitamin overdose and cause health issues. 
  • Try combining the liver with other food options to make up a nutritious meal. 
  • Chicken liver can be given to your pup and cats now and then as a treat. 

You May Also Like

How to Fix Yellow Flame on Gas Burner? [Main Causes]

0

No matter if you work as a gas expert for a living or are a resident, you may have occasionally pondered what color your gas burners were. What indicates a burner flame that is yellow indicate? How to fix yellow flame on gas burner? What shade of flame should you expect from a gas range?

Quick Response.

How to fix yellow flame on gas burner?

–         Look into the fuel supply.

–         Sanitize the burners.

–         Change the fire.

–         Verify the stove and gas service.

Overview

It’s crucial to make sure any gas burners are functioning securely and effectively when you have any in your house. A yellow flame becomes a problem one can run into, and this could indicate that now the gas isn’t cooking properly.

It may indicate that now the gas isn’t really burning correctly if you have observed that now the flames of the gas burner appear yellow. Numerous problems, such as a low gas source, filthy or blocked burners, or a fault only with the fuel supply or stove element, might result in a yellow flame.

A yellow flame may be hazardous as well as annoying since it can release carbon monoxide. This poisonous chemical can accumulate in unventilated places and result in disease or death.

In order to guarantee that a gasoline burner is running safely and effectively, we will examine the reasons why a gas burner’s light becomes yellow throughout this post and offer advice for resolving the problem. Regarding “how to fix yellow flame on gas burner,” this post will provide helpful information.

Why is It Necessary to Seek Immediate Repair for a Yellow Flame?

It’s abnormal and a sign that the gas isn’t burning correctly when a gasoline burner’s flame turns yellow. Numerous problems, such as a reduced fuel feed, a filthy or blocked burner, or a fault only with the fuel supply and stove component, may be to blame for this.

Since it can create carbon monoxide, a poisonous gas that has no flavor or smell, if the gasoline is not cooling correctly, it could be harmful. Insufficient ventilation can allow carbon monoxide to accumulate, which can be fatal or sickening.

To reduce the chance of poisoning through carbon monoxide as well as to ensure the burners are running safely and effectively, it is crucial to correct a yellow flame upon the gas stove as quickly as possible.

How to Fix Yellow Flame on Gas Burner? Solutions

The gas cooktop could emit a yellow flame for such a number of causes, with several remedies for each problem. These potential reasons and solutions are listed.

There is an Insufficient Gas Supply

A limited fuel supply towards the burner may be the source of the flame’s yellow color and feeble intensity.

Solution

You could change the fuel distribution valves to solve this and see if that works. In order to prevent poor gas flow, you must also inspect any obstructions in the fuel supply tube and line.

There Needs to be More Flame

A weak, yellow flame indicates that the flame is not adjusted high sufficiently.

Solution

Try turning the flame up to remedy this. The yellow flame might emerge from the gas burning insufficiently, whereas if the light becomes too low.

Inadequate Oxygen

A clogged air intake or a malfunctioning air mixing can both result in a yellow flame, which could be a sign that there’s insufficient oxygen getting to the stove.

Solution

Examine the air entrances upon that flame to ensure they really aren’t clogged in order to resolve this. It can be an issue with the air mixing if the airflow nozzles are clean, but the flames still seem to be yellow. In such a situation, you might need to hire a specialist to fix or rebuild the mixer.

Incorrect Gas Combination

Another factor that contributes to a yellow flame is inappropriate gas mixing, which could happen when the air pressure is excessively or too weak. There may be a problem with the gas’s correct burnt, whereas if the flame appears yellow as well as a heavy gas odor. This may be caused by an issue with the flame, the gas pipeline, or even the stove proper.

Solution

We may be required to modify the compressed gasses or let a specialist change them for you in order to repair this. To identify and resolve the issue, you must switch off the fuel supply and call a gas professional.

Burning Dirty

A filthy burner may also result in a yellow flame because sand and grime prevent the gasoline its properly combining with the oxygen. The burner may be blocked or unclean, whereas if the flame seems yellow as well as flickering.

Solution

Clear any blockages from the burners and give them a thorough cleaning to repair the problem. By taking the burner out of the oven, you may gently scrape away excess particles or dirt with a little brush or swab. Additionally, ensure the burner openings are unobstructed by checking them.

Defective Control Valves

The gasoline burner’s pressure regulator may be broken, which will result in a yellow flame.

Solution

We would require expert repair or replacement of the pressure regulator to resolve this.

One must always cut off the fuel supply and call a gas professional for assistance if you are experiencing issues with your burner. It is crucial to remember this. Unless you are skilled and equipped to do so, avoid attempting to remedy the problem yourself. Constantly seek expert help if you find it difficult to determine the reason for such yellow flame or if you need clarification on how to resolve it.

What Shade of Flame Does a Gas Stove Typically Have?

The blue flame is the perfect color for a gas stove. The gasoline is correctly and effectively burning when the flame is bluish. It shouldn’t flicker or give off a distinct gas odor, and the blue flame must be high and continuous.

A symptom that the gasoline is just not smoking correctly may be a flame that is yellow or orange. Numerous problems, such as a low gas source, a filthy or blocked burner, or a faulty well with a gas pipeline or stove component, may be to blame for this.

You May Also Like

Whirlpool vs Samsung Washer : Let’s Choose the Best

0

Whirlpool, as well as Samsung, are currently among the best-known brands available. It might be challenging to select which model is appropriate for you because both firms provide a wide range of options. In order to assist you in making a choice, we will compare “Whirlpool vs Samsung washer” throughout this post.

Quick Response.

Whirlpool vs Samsung washer. How are they different? In summary, Whirlpool is also highly dependable and frequently more economical, whereas Samsung washers typically offer higher performance, excellent water usage, and dependability.

Overview

Because of its reputation within the washer industry, Samsung holds the second-largest presence in India. However, Whirlpool is particularly well-known for its top-loading washers since they provide feature-rich models at reasonable prices.

We frequently get confused among “Whirlpool vs Samsung washers,” despite the fact that both Whirlpool, as well as Samsung, is among the greatest manufacturers of washers. When buying a washer, there are several things to take into account, including capacity, functionality, and cost.

In order to make a good decision, let’s compare the washing machines from Whirlpool and Samsung along with all the relevant factors.

Brand Overview

Regarding Whirlpool

The founders of the American company Whirlpool were Louis as well as Emory Upton, who established it in 1911. Particularly well-known for its household items, Whirlpool is among the top manufacturers of washers in India.

After entering the country in 1987, Whirlpool started marketing small machines there. They have therefore been active in this field for further than thirty years. Because of this, they are aware of Indian consumers’ demands and offer high-quality cleaners at a low cost. And they offer fantastic customer service.

Regarding Samsung

South Koreans produce Samsung products. This company’s founder, Lee Byung-Chul, created it in 1938. Samsung makes a variety of goods, and I’m willing to bet that you’ve just used only at least once among them. Throughout India, these are among the most well-known brands.

Since 1995, when Samsung first arrived on the scene, the company hasn’t turned back. The reason Samsung washers cost a little bit more often than Whirlpool is because they firmly think of elevated, quality brands.

Additionally, Samsung offers exceptional customer service, as well as the greatest thing, is you are able to locate a Samsung repair shop everywhere in India. Therefore, if you reside in a remote location, you may find their support centre in the closest city.

Whirlpool vs Samsung Washer

Software

All washer brands’ characteristics and capabilities are distinct from one another. Each of them has specific benefits and drawbacks. Whirlpool washer units are able with very capable and practical sensors. However, Samsung washers are often outfitted with the most recent advantages in technical development.

Washing Features

The volume, cycles, as well as choices of both, are comparable. When you run into issues, this Samsung Smart Care feature that is included in all versions is fantastic. Whenever people need to remember to have a piece of clothing, the add rinse feature is quite helpful.

An excellent safety mechanism is the exhaust sensor, which informs you when and where to inspect your ducts. When you combine the Samsung devices, it could be difficult for persons under 5′ 11″ to understand the height of a display.

Your garments will receive a thorough tumble thanks to the attractive baffle structure of the Whirlpool appliances. For somebody who is preoccupied with other tasks and neglects to turn on their washing, the Fan Fresh function is a godsend. In addition to saving you time, the optimum dispensing feature will also assist you in avoiding using too many detergents.

Intake of Water

Samsung washers are the only option if limiting your household’s water usage is vital to you. The Wobble Mechanism is included in a Samsung washer. This function enables the washer to produce vertical stream flows that will effectively push the laundry upward and downward throughout the washing process.

A Samsung washer device’s superior Monsoon washing cycle will also provide you with quicker rinses and spins during the monsoon. Samsung washers have a unique function called the aqua preserve feature. By doing this, you may use the liquid from the last rinse to water your clothes again. Consequently, water usage is reduced.

Efficient Use of Energy

Our response, if you had been to inquire, would be that both are cost-effective, energy-efficient options. Both companies produce cars with fuel efficiency as a top emphasis. Such washers are technology-assisted energy-saving gadgets that don’t sacrifice wash quality.

Consistency

Consumers Samsung as a dependable option, despite the fact that Whirlpool is indeed a trusted brand that has existed for a while. The strong construction combined with the newest innovations creates the ideal washer bundle, which is why.

Performance

Samsung produces excellent top-loading and front-loading washers, but the company, in general, places a strong emphasis on efficiency, dependability, and longevity.

Samsung washers have some wonderful features, but their main priorities are providing flawless efficiency and protecting the integrity of the fabrics they wash. So, regardless if it is a front-loading or top-loading washer, Samsung earns additional points for overall efficiency.

Price

If the cost should be your first priority when buying a front-load washer, top-load washer, or semi-automatic washer, Whirlpool is the brand to choose. In comparison to Samsung’s top and front washers, a Whirlpool washer is a more economical option.

A lower price doesn’t necessarily indicate a lower level of functionality or reliability from the brand. Washers made by Whirlpool are reliable. They are priced lower than Samsung, though, so that is a positive.

Conclusion

Which washer machine brand to choose—Whirlpool or Samsung—might be there on your mind if you’re on the hunt for a new one. Which washer would be the greatest suit you, then? You’ve hopefully been able to reduce your possibilities with the aid of this guide.

  • You only need to make a decision based on your needs because Samsung, as well as Whirlpool would both be fantastic front-load washer brands.
  • The greatest brand of front-load washers is Samsung.
  • The greatest brand of the top-load washer is Whirlpool.
  • Whirlpool has always been the finest brand for washers that are semi-automatic.
  • Whirlpool and Samsung washers are two excellent selections if you’re looking for the greatest front-loading washer.

You May Also Like 

What Does Pheasant Taste Like? [Quick & Interesting Facts]

0

Pheasant hunting is a pretty famous event in the counties of the Great Plains, where approximately around 1 million pheasants are shot annually. You surely must have met the meat in your local stores, especially in the season. What does pheasant taste like? If you have not tried a pheasant before, you may have this question popping up in your mind, with the hesitation of buying. 

Pheasant is widely sold between October to February. It is wild meat, and also there are pheasant farms. South Dakota is the king of wild pheasant harvest. Mostly the farmland owners shoot the pheasants in their lands in the open seasons, and the common law accepts it. Both eggs and meat are considered high nutrient intake and delicious meat. These wild birds were initially found in Asia and were introduced to the states in the 1800s. 

What Does Pheasant Taste Like? 

Chicken is the poultry we often lean on to. When you need a unique taste change, pheasant meat would be ideal if you feel fed up with the usual bland chicken drumsticks. This game bird meat contains more proteins and less saturated fat than that of chicken and other commonly consumed meat like beef, pork, mallard, and lamb. 

What does pheasant taste like? If you didn’t try this poultry yet, you would be confused near the butcher with this question. But you do not even need to worry a bit about the taste and matching it to your preferences as it contains a much more delicious taste than the chicken you eat. The pheasant dishes will carry a unique wild flavour and can be prepared in many recipes. The texture is similar to chicken, and you can follow the same methods you use to cook chicken. A pheasant consists of both dark and white meat, and you will find a juicy texture from a correctly prepared pheasant dish. 

How Long Does It Take a Pheasant to Cook?

Pheasant should be well-cooked before consumption. The time may vary according to the method you follow for cooking. If you like the distinct flavour of the pheasant, you can always add fewer spices and flavours to the meat when cooking. Pheasant can be smoked, baked, fried, roasted, and made into a curry or grilled. 

If you are using the oven for baking the whole pheasant, preheat the oven to 430°F and set the timer for 15 minutes. After 15 minutes, decrease the temperature to 350°F and cook for another 35 minutes. Sometimes it would take about an hour. Make sure you place the tray in the middle of the oven. You can insert a fork and check the colour of the juice. If it is still pink after 50 minutes, bake extra time accordingly. But do not overcook to avoid toughness. If you have a food thermometer, check the inner temperature and maintain the temperature around 155- 165 °F. Leave the pheasant for about 10 minutes before serving. 

When you want to grill pheasant for a barbeque party, you should preheat the grill to 275°F. Turn the meat pieces while grilling, and you will need to grill for about 10 minutes. You can season with barbeque sauce, salt, and pepper to your taste before grilling.

Should You Soak Pheasant Before Cooking? 

Whether it is farm-raised or wild, the meat itself presents a distinct gamey taste. If you are not a fan of the gamey undertone of meat, then you can do a simple trick before cooking. First, emerge the meat in ice water for about 2 minutes.

Then remove the water and refill the container with hot water. Keep it for another 2 minutes and remove the water. Continue the same steps 3 or 4 times. This will draw the blood in the meat, and you will have a pheasant without its wild taste. 

If you do not like the strong wild taste of pheasant, you can remove the fat and the silver-coloured skin part before cooking. The same results could be obtained by letting the meat rest for a few hours in salt water.

This is called brining. Some people make the salt solution by adding salt, a little sugar, and bay leaves to hot water. They sink the meat in that solution when it completely cools down. Some people add vinegar to water and take it as a soaking mixture. You can also use buttermilk for the soaking purpose. 

Soaking for a long time would make better results in cooking older pheasant meat. But if you are soaking in a salt mixture, ensure you do not pass more than 4 hours. This is to avoid excess salt absorption. Soaking also helps the meat to expand and avoid losing all the moisture when cooking. Therefore, if your previous experience with pheasant is relatively bad, try soaking for more soften-meat in your dishes. 

Can You Eat Pheasant Slightly Pink?

Some may think that pinkish colour is seen in the half-cooked pheasant meat. But generally, some birds will present pinkish colour even after fully cooked. Especially the younger hens. If the pinkish vibe has vanished, the pheasant has been overcooked. 

If you follow the saltwater sinking before cooking, there will be fewer effects of overcooking if you accidentally forget to switch off the fire or take it out of the oven. We have explained the process with the reasons in the above paragraphs.

What Do You Eat With Pheasant?

When you want to change the usual dinner table, a pheasant roasted with some sour cream will do the best for your delight. You can bake a whole pheasant with mushrooms, bacon, and your desired vegetables as a filling. 

You can add veggie side dishes like roasted tomato, coleslaw salad, French fries, creamed spinach, mashed potatoes etc. It will also make a well-matched duo with pasta salad or fresh corn salsa.

Conclusion

If you often face shilly-shally situations at the meat department of a supermarket when you see pheasant for sale, this article will clarify all your doubts. Here, we have included some ways to adjust the meat to your flavour.

 You May Also Like

Can Bed Bugs Get in Your Private Parts? Guide

0

It appears to be the subject of nightmares—a swarm of bed bugs calling your intimate areas their habitat. Can bed bugs get in your private parts? We’re here now to dispel the majority of urban legends you could be aware of.

Can bed bugs get in your private parts? It’s important to know that bed bugs never thrive in your intimate areas.

Overview

Despite being a small parasite, bedbug infections can cause severe pain and distress. You must deal with it every day because its principal position is within your bedroom. However, can bed bugs get in your private parts? Let’s investigate further.

Can Bed Bugs Get in Your Private Parts?

Your genitalia or any other portion of the body is not home to bed bugs. In addition to not being able to dwell permanently upon the body due to high heating, bed bugs also lack the necessary security to endure and procreate.

Acidified vaginal secretions will seal all of the breathing openings in bed bugs’ abdomens, making it impossible for them to thrive inside of your privates. They could die as a result of choking and suffocation. However, they would nip at any exposed flesh on your body, including your genitalia.

Why Can’t Bed Bugs Go Inside Your Genitalia?

It would be challenging to prevent bedbugs from entering your intimate areas if your mattress is infested with insects. This may be the case, but there are a number of other reasons for bedbugs to avoid your intimate areas.

Even if bed bugs can’t get into your personal spaces, it doesn’t mean they can’t bite there. If this is a spot they can readily get, they could bite the regions surrounding the private parts but probably won’t climb within. Despite the fact that bedbugs might enter your intimate areas, there are some factors why bugs could not be effective.

  1. Suffocate Quickly

Bedbugs seldom make it to your intimate areas due to vaginal secretions. Contrary to humans, bedbugs inhale through a network of small openings in their stomachs known as that of the trachea rather than their lungs.

As a result of the vaginal secretions clogging these holes, the bedbug won’t be able to breathe. These bedbugs would finally die from suffocation and choking.

  1. Variables that are Acidic

Acidic substances like peroxide, as well as lactic acids, can be discovered in the vaginal discharge. Considerable contact with the acids would cause bedbug death.

  1. Increased Temperatures

Bedbugs are highly uncomfortable when certain sensitive areas, particularly those on women, remain heated all day. Too-tight undergarments make you sweat in your intimate areas. Bedbugs find it challenging to access your intimate areas since this sweat is salty.

  1. Lack of Airflow

Bedbugs cannot thrive without oxygen because of the poor airflow within private places. The insects cannot last even just a minute without oxygen.

  1. Periodic Bleeding

There is no truth to the myth that bed bugs are drawn to blood at such periods of the month. This could occur because your menstrual fluid contains trash and other elements that bedbugs are not fond of. In actuality, during your menstruation, bugs cannot penetrate your intimate parts.

Do Bed Bugs Nip at the Genitalia?

It is true that bed bugs could attack your genitalia and the surrounding area. It doesn’t especially draw them in or repel them, either. However, bed bugs have a tougher time getting to this region of the body. Therefore, bed bug bites are less prevalent down below.

As previously indicated, bed bugs would bite anywhere there is clear, exposed skin. They’ll bite upon that exposed skin there if insects are able to get anywhere close to your privates. Additionally, the flesh on the genital area is relatively thin, making it easier for bugs to drain blood from the area.

But there is a reason why your intimate areas are kept private. In order to get to your flesh, bed bugs won’t try to get beneath your jeans or bite into your apparel. Such bugs won’t get to the genitals if you’re resting nude or wearing very loose-fitting clothes. Instead, they will accept the easiest-to-reach exposed flesh.

Are Bed Bugs Able to Enter the Ears?

People automatically dread bed bugs creeping into their organs, such as the noses, lips, or eardrums, after they realize that they are going about their bodies during the time they’re sleeping. While it is feasible, it is improbable since bed bugs are intelligent and wise animals and have no desire to stow away within a human.

The ground is where bed bugs may find all they require. These animals have unique snouts that enable them to pierce your skin and consume human blood as food. In addition, despite their modest size, these critters are a bit too large to go into your ear holes and nose.

What If there are Bed Bugs Inside the Hair and Scalp?

Although it’s improbable, bed bugs might reside in the hair. Every bed bug encounter while brushing your hair is probably an isolated incident brought on by error or deception. When you have a shaved head, bed bugs might bite people there, but other than that, they are not likely to infect your head.

In contrast to fleas, ticks, as well as other insects, bed bugs prefer to feast on exposed skin wherever entry is simple. Capillaries that are visible on the skin are preferred by bed bugs. The body parts with the least amount of hair included are the collar, face, hands, feet, as well as other bald spots.

Additionally, because bed bugs like chilly temperatures, insects will only bite their victims before returning to their hiding location to consume their prey. You could carefully comb, rinse, and use a hair dryer to blow-dry your hair when you’re concerned.

Can Bed Bugs Reside on People?

There is no region of the human where bed bugs can reside. They live close to the server and have dark, secluded areas in their home. The parasites are found in the beds’ small cracks, as well as in your bedding. They conceal and multiply by using any slit that is accessible. This distinguishes them from ticks as well as lice.

Heat and high temperatures do not particularly appeal to bed bugs. Such crawlers can even be repelled by the heat that your body makes. Additionally, your internal organs are even heated. Therefore, they prefer not to look for a property there.

You May Also Like